If you are running a popular website that utilizes WordPress you may have been asking yourself how you can have the site perform better. Outside of the slew of plugins and functions you can use, you can use a CDN (Content Delivery Network) to speed things up a notch. A content delivery network is a slew of computers or servers located around the state, country, or wold that caches data for you. This can reduce latency by having content delivered to your reader from a location that may be closer to them than your hosting provider’s server is.
If you are ready to take the plunge and sign up for a CDN, do your research. Pricing and options vary greatly. For a few of the sites I work with, we have chosen to use MAXCDN and this tutorial is by no means an endorsement or a review of their services.
Prerequisites:
First thing is first, you will need to install a caching system for WordPress. MAXCDN recommends using W3 Total Cache, but I have had some issues with it in the past and have settled comfortably on WP Super Cache.
Secondly, you will have to have a MAXCDN account.
Once you have fulfilled both of those requirements you can start to set up your MAXCDN service.
- Click Manage Zones
- Under Pull Zones click Create Pull Zone
- Pull Zone Name: Type something like “MY SITES PULLZONE” (I chose “testing” for this tutorial)
Origin Server URL: this is your website’s domain name (ie. https://computingondemand.com)
Custom CDN Domain: This will be like a subdomain of your website. You can use something like mycdn.computingondemand.com
Label: Something descriptive
Compression: I would enable this by checking the box. - Press the Create button
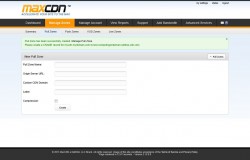
You will be greeted by a similar screen and may be wondering if what you did actually worked, but if you notice, there is a green box at the top that states:
Pull Zone has been successfully created. Manage Pull Zone
Please create a CNAME record for mycdn.yourdomain.com to testing.yourdomain.netdna-cdn.com
Now, you should create a CNAME record for you new CDN. If you don’t know how to do this, ask your website administrator or the hosting company you use. This may be the only aspect of this tutorial that you do not have control over. If you use a Control Panel, you can most likely log into it and create the CNAME record very easily.
If you are using cPanel you can just use the filter at the top to find Simple DNS Zone Editor.
Under the section for Add a CNAME Reccord:
- Name: mycdn.yourdomain.com
- CNAME: testing.yourdomain.netdna-cdn.com
Once all that is finished, you can configure WP Super Cache and WordPress to use your new CDN.
In your settings section of WordPress, click the options for WP Super Cache. Depending on your configuration, this may open to Easy or Advanced.
- Click the CDN Tab
- Check the box for Enable CDN Support
- Populate the Off-site URL with your friendly CDN URL: mycdn.yourdomain.com
- Leave the defaults for the rest.
- Click Save Changes
- Click the Contents Tab
- Delete Cache
Enjoy!
 Computing on Demand PC News & Reviews


Thanks, i have just done this and which cache plugin is the best match for maxcdn ? super cache or total cache ?
I use and prefer WP Super Cache.