Having my latest server build running on the Windows Server platform, there are a number of things that I have found to become a bit more difficult than I am used to. Not only have I switched to Windows as the platform, I am using Storage Spaces. This in itself is a departure from my comfort zone and has presented some scenarios that I wasn’t quite prepared for. Like trying to remove a disk that Windows, for some reason, wants to keep.
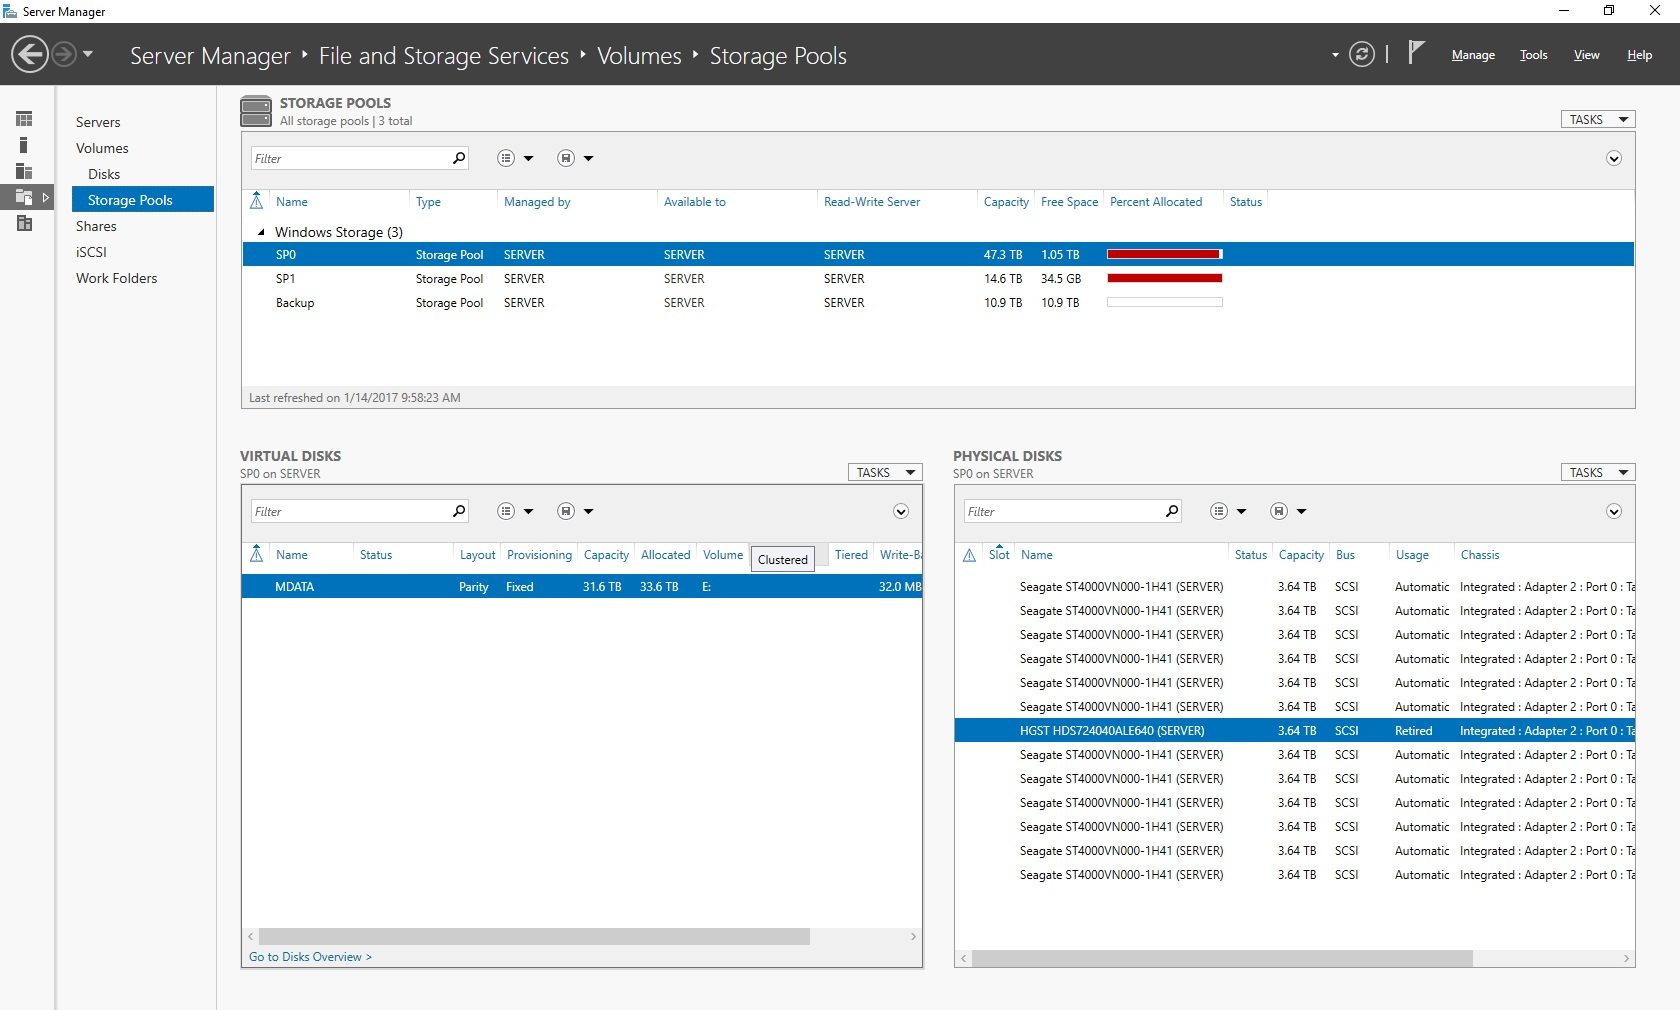
Let’s start off with a little background. I created a number of storage spaces to segregate data that is used differently. This allows me to make sure that volumes that will have a lot of data read from them will be separate from volumes that will have less read than written. The setup was a breeze and things were humming along nicely until I started replacing disks. For the most part, the GUI made things easy. I would add a disk to the pool, then retire the disk I wanted to replace, and remove it. At that point, I would rebuild, wait for the process to finish, then start again when I was ready to replace another disk.
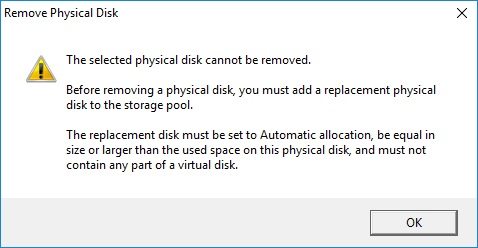
In my last go around, Windows took the disk I added but did not want to release the one I wanted to remove. Instead, she (Windows) would present me with a popup telling me that “The selected physical disk cannot be removed” and that “Before removing a physical disk, you must add a replacement physical disk to the storage pool.” Annoyingly, this had been done, but Windows will not agree.
Alas, back to the familiar command line to try to figure out a solution. In this case, PowerShell would the be the method.
The first thing I did was to list out the physical disks
Get-PhysicalDisk
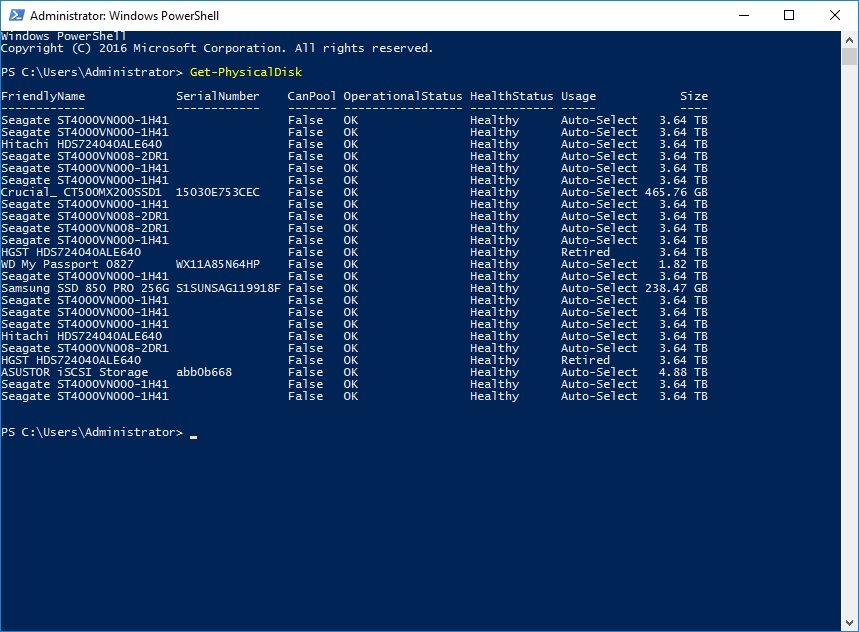
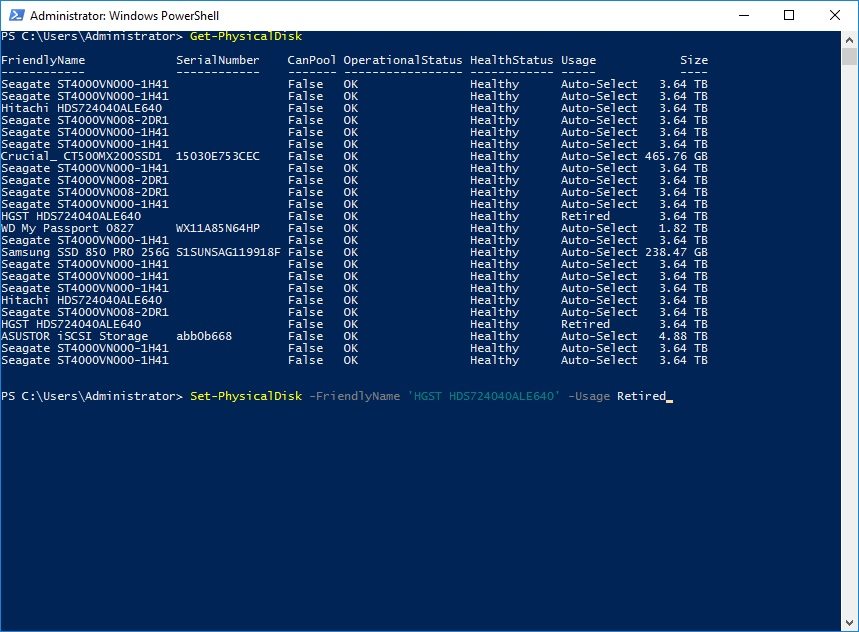
With the list of disks I can determine, by friendly name, which of them I wanted to retire, then remove. With that information in hand, I can pick the virtual disk that the disk belongs to. In my case, I wanted to remove the HGST HDS724040ALE640 drive from the pool.
Set-PhysicalDisk -FriendlyName 'HGST HDS724040ALE640' -Usage Retired
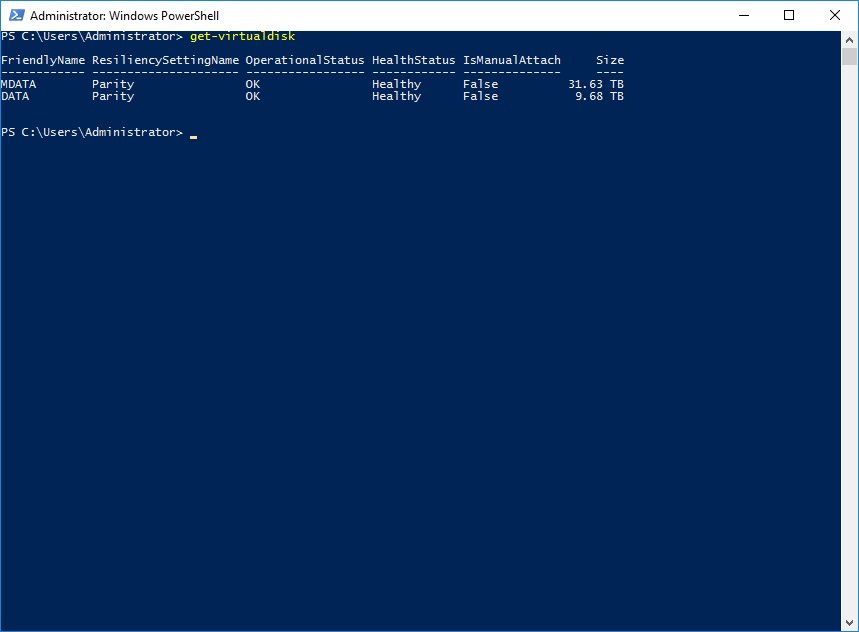
In order to remove the disk, a repair must be completed. However, if you have more than one virtual disk, you must figure out which you are repairing. In my case, the virtual disk is MDATA
Get-VirtualDisk
Kicking off the repair:
Repair-VirtualDisk -FriendlyName 'MDATA'

Monitor the Repair progress
Get-StorageJob

When the repair has completed, it will most likely take a long time, you can remove the disk from the pool.
Remove-PhysicalDisk -FriendlyName 'HGST HDS724040ALE640'
There you have it. A disk gone through PowerShell that Windows GUI wouldn’t release.


