Getting your rig up and running may not be that difficult to start, but you may soon realize that there are a lot of things running in Windows 10 that do not need to be a part of your mining experience or may cause unexpected results. For instance, things like Cortana and OneDrive serve no purpose. Additionally, Windows Update may reboot your system in the middle of the night without warning. Getting Windows setup properly for mining is not difficult and here are some of the more common things you should consider.
Table of Contents:
- Disable Windows Update
- Disable User Account Control
- Configure Virtual Memory
- Disable Visual Effects
- Disable Windows Hibernation
- Enable Remote Desktop
- Configure Automatic Login
- Configure Power Options
- Disable Cortana and Bing Search
- Remove Windows 10 Built-in Apps
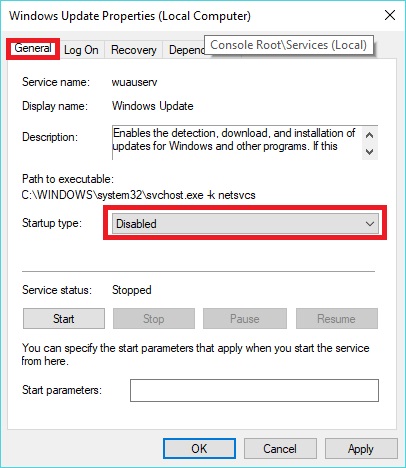
Disable Windows Update
- Open a run dialogue box (WIN+R)
- Type Services.msc
- Find Windows Update – Right Click and choose Properties
- Change Startup Type to Disable

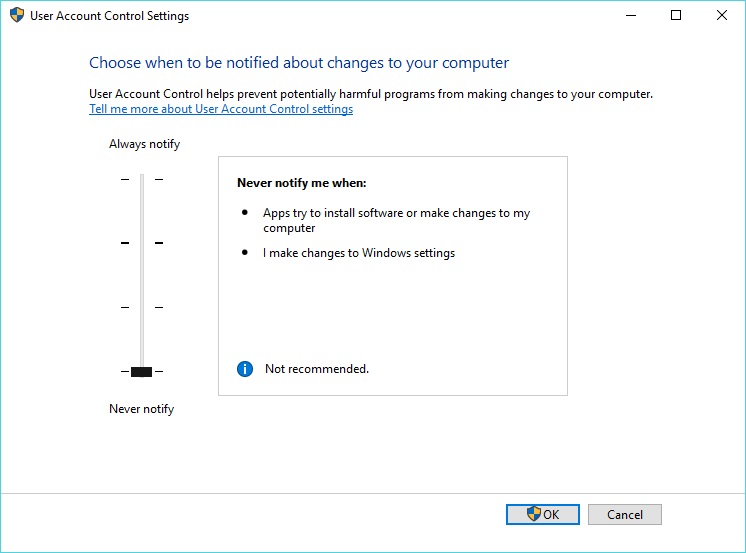
Disable User Account Control
- In the Window Search Bar type Change User Account Control Settings
- Move the Slider to the bottom Never Notify and it displays Never notify me when:
Configure Virtual Memory
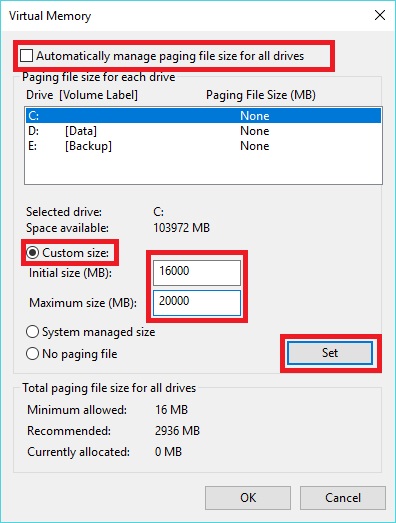
From what I have learned, the rule of thumb is the sum of all GPU memory per card (minimum of 16GB) and at least the sum of all GPUMEM+1
For example:
- System with 4 x 4GB GPU = Min 16GB, Max 20GB
- System with 1 x 8GB GPU + 3 x 4GB GPU = Min 20GB, Max 24GB
- Open File Explorer
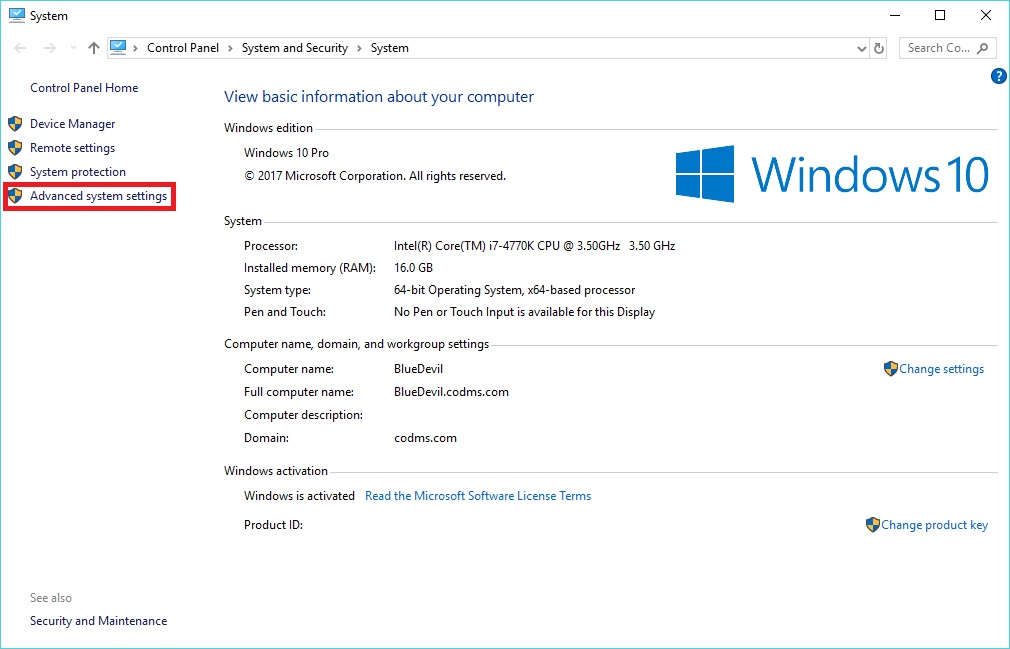
- Right Click This PC and Choose Properties
- Click Advanced System Settings
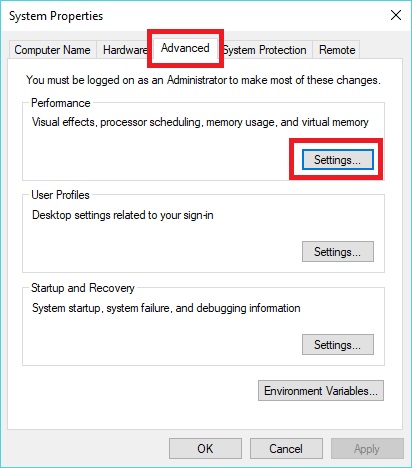
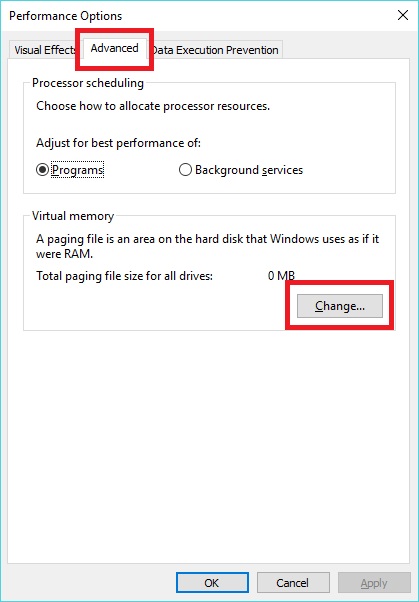
- Advanced Tab under Performance, Click Settings
- Click the Advanced Tab
- Click Change to configure Virtual Memory
- Uncheck Automatically manage paging file size for all drives
- Select the Radio button for Custom Size
- Enter your settings
- Click Set
- Reboot if necessary

Disable Visual Effects
- Open File Explorer
- Right Click This PC and Choose Properties
- Click Advanced System Settings
- Advanced Tab under Performance, Click Settings
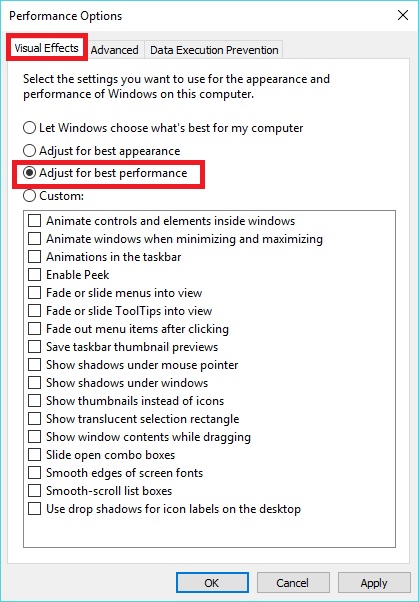
- Click the Visual Effects Tab
- Choose the Radio button for Adjust for best performance
- Click Ok
Disable Windows Hibernation
- Right Click on the Start button
- Click Command Prompt (Admin)
- Type powercfg.exe /hibernate off
- Press Enter
- If you want to re-enable at some time
- powercfg.exe /hibernate on
- If you want to re-enable at some time
Enable Remote Desktop
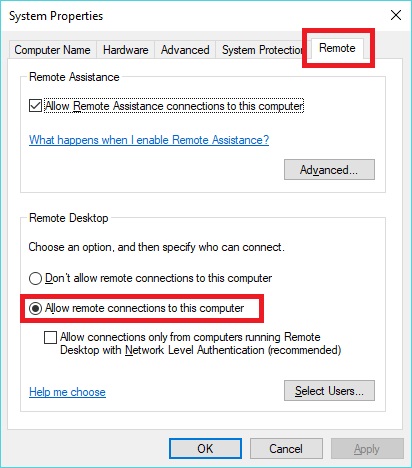
Managing your mining machine is much easier when you can do this remotely. There are a number of ways to do this with 3rd party software (TeamViewer), but if you are going to manage your machine from your local network, Remote Desktop is hard to beat.
- Open File Explorer
- Right Click This PC and Choose Properties
- Click Advanced System Settings
- Remote tab
- Choose the radio button for Allow remote connections to this computer
- Click Ok
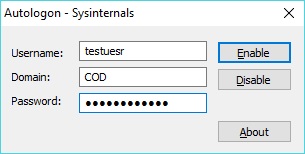
Configure Automatic Login
There are plenty of ways to enable automatic login, some of them more complicated than others. Personally, I like to use a utility from SystInternals called Autologon for Windows
Download: http://forums.computingondemand.com/files/file/60-autologon-for-windows/
- Right Click on the .zip file and choose Extract
- Execute Autologon.exe
- Agree to the licensing
- Enter Your Username and Password, Domain should be prepopulated
- Click Enable
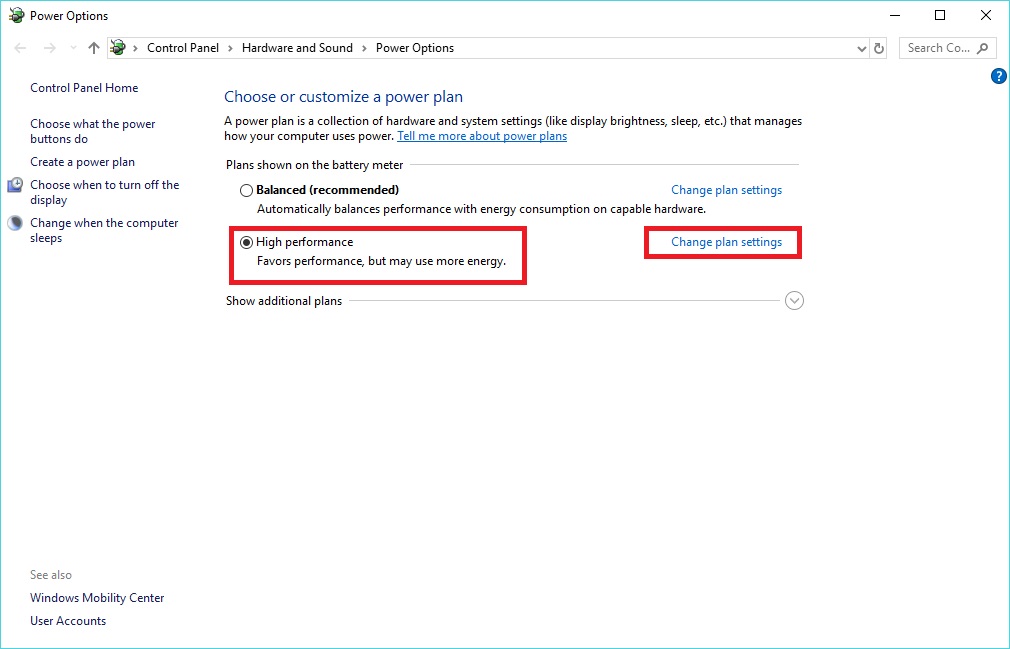
Configure Power Options
Out of the box, Windows 10 configures itself for a Balanced power plan. Balanced automatically balances performance with energy consumption on capable hardware. In other words, it will sleep, hibernate, etc.
For our purposes, we want High Performance, with some minor changes
- In the search bar, type Choose a Power Plan
- Click the Radio button for High Performance
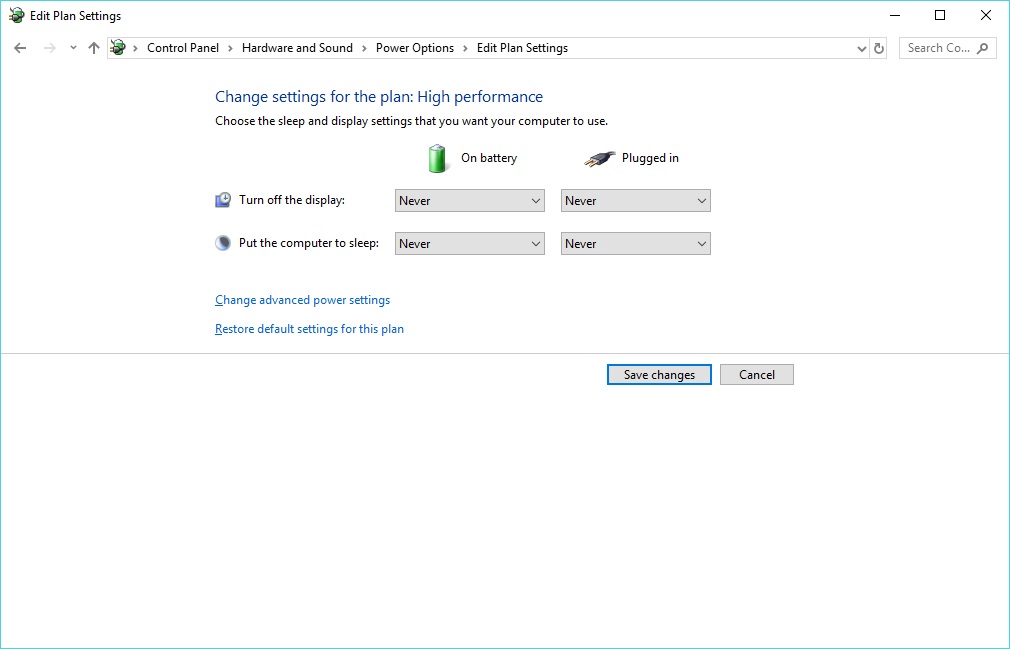
- Click Change Plan Settings
- On each dropdown presented, change the value to Never
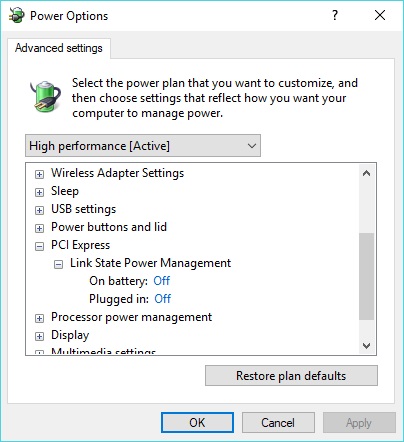
- Click Change advanced power settings
- Validate that Link State Power Management is Off
- Expand PCI Express
- Expand Link State Power Management
- Change the setting to off
Disable Cortana and Bing Search
There is simply no reason to have Cortana running on your mining rig.
- Open a run dialogue box (WIN+R)
- Type regedit.msc
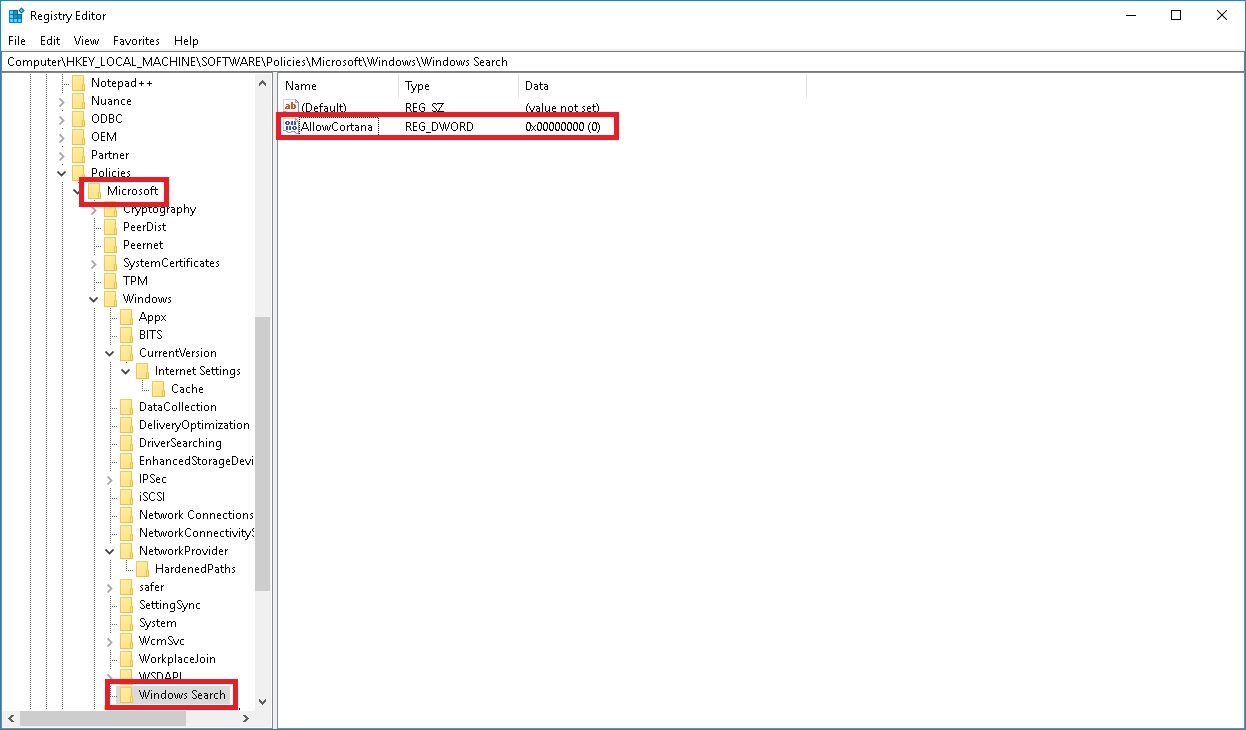
- Navigate through to HKEY_LOCAL_MACHINE\SOFTWARE\Policies\Microsoft\Windows\Windows Search
- If Windows Search isn’t there, you must create it.
- Right Click on Windows
- Click New > Key
- Type Windows Search
- Right Click Windows Search
- Click New > DWORD (32-bit) Value
- Type AllowCortana and set its Value to 0 (zero)
- If Windows Search is present, change it’s DWORD value to 0 (zero)
- If Windows Search isn’t there, you must create it.
- Navigate through to HKEY_LOCAL_MACHINE\SOFTWARE\Policies\Microsoft\Windows\Windows Search
- Right Click Search
- Click New > DWORD (32-bit) Value
- Type BingSearchEnabled and set its Value to 0 (zero)
Remove Windows 10 Built-in Apps
Windows 10 comes with a slew of applications that makes typical computing a better experience, but on a mining machine, much of it is waste.
- Open PowerShell with administrator privileges
- in the search bar type PowerShell, when the result presents itself, right click and choose Run as Administrator
- Choose from the following list of command to remove apps
- 3D Builder: Get-AppxPackage *3dbuilder* | Remove-AppxPackage
- Alarms and Clock: Get-AppxPackage *windowsalarms* | Remove-AppxPackage
- Calculator: Get-AppxPackage *windowscalculator* | Remove-AppxPackage
- Calendar and Mail: Get-AppxPackage *windowscommunicationsapps* | Remove-AppxPackage
- Camera: Get-AppxPackage *windowscamera* | Remove-AppxPackage
- Get Office: Get-AppxPackage *officehub* | Remove-AppxPackage
- Get Skype: Get-AppxPackage *skypeapp* | Remove-AppxPackage
- Get Started: Get-AppxPackage *getstarted* | Remove-AppxPackage
- Groove Music: Get-AppxPackage *zunemusic* | Remove-AppxPackage
- Maps: Get-AppxPackage *windowsmaps* | Remove-AppxPackage
- Microsoft Solitaire Collection: Get-AppxPackage *solitairecollection* | Remove-AppxPackage
- Money: Get-AppxPackage *bingfinance* | Remove-AppxPackage
- Movies & TV: Get-AppxPackage *zunevideo* | Remove-AppxPackage
- News: Get-AppxPackage *bingnews* | Remove-AppxPackage
- OneNote: Get-AppxPackage *onenote* | Remove-AppxPackage
- People: Get-AppxPackage *people* | Remove-AppxPackage
- Phone Companion: Get-AppxPackage *windowsphone* | Remove-AppxPackage
- Photos: Get-AppxPackage *photos* | Remove-AppxPackage
- Store: Get-AppxPackage *windowsstore* | Remove-AppxPackage
- Sports: Get-AppxPackage *bingsports* | Remove-AppxPackage
- Voice Recorder: Get-AppxPackage *soundrecorder* | Remove-AppxPackage
- Weather: Get-AppxPackage *bingweather* | Remove-AppxPackage
- Xbox: Get-AppxPackage *xboxapp* | Remove-AppxPackage
- To restore them for some reason
- Get-AppxPackage -AllUsers| Foreach {Add-AppxPackage -DisableDevelopmentMode -Register “$($_.InstallLocation)\AppXManifest.xml”}


